Started 20/11/12
I've been very busy over the last couple of months, so got a bit behind with the posts on here.
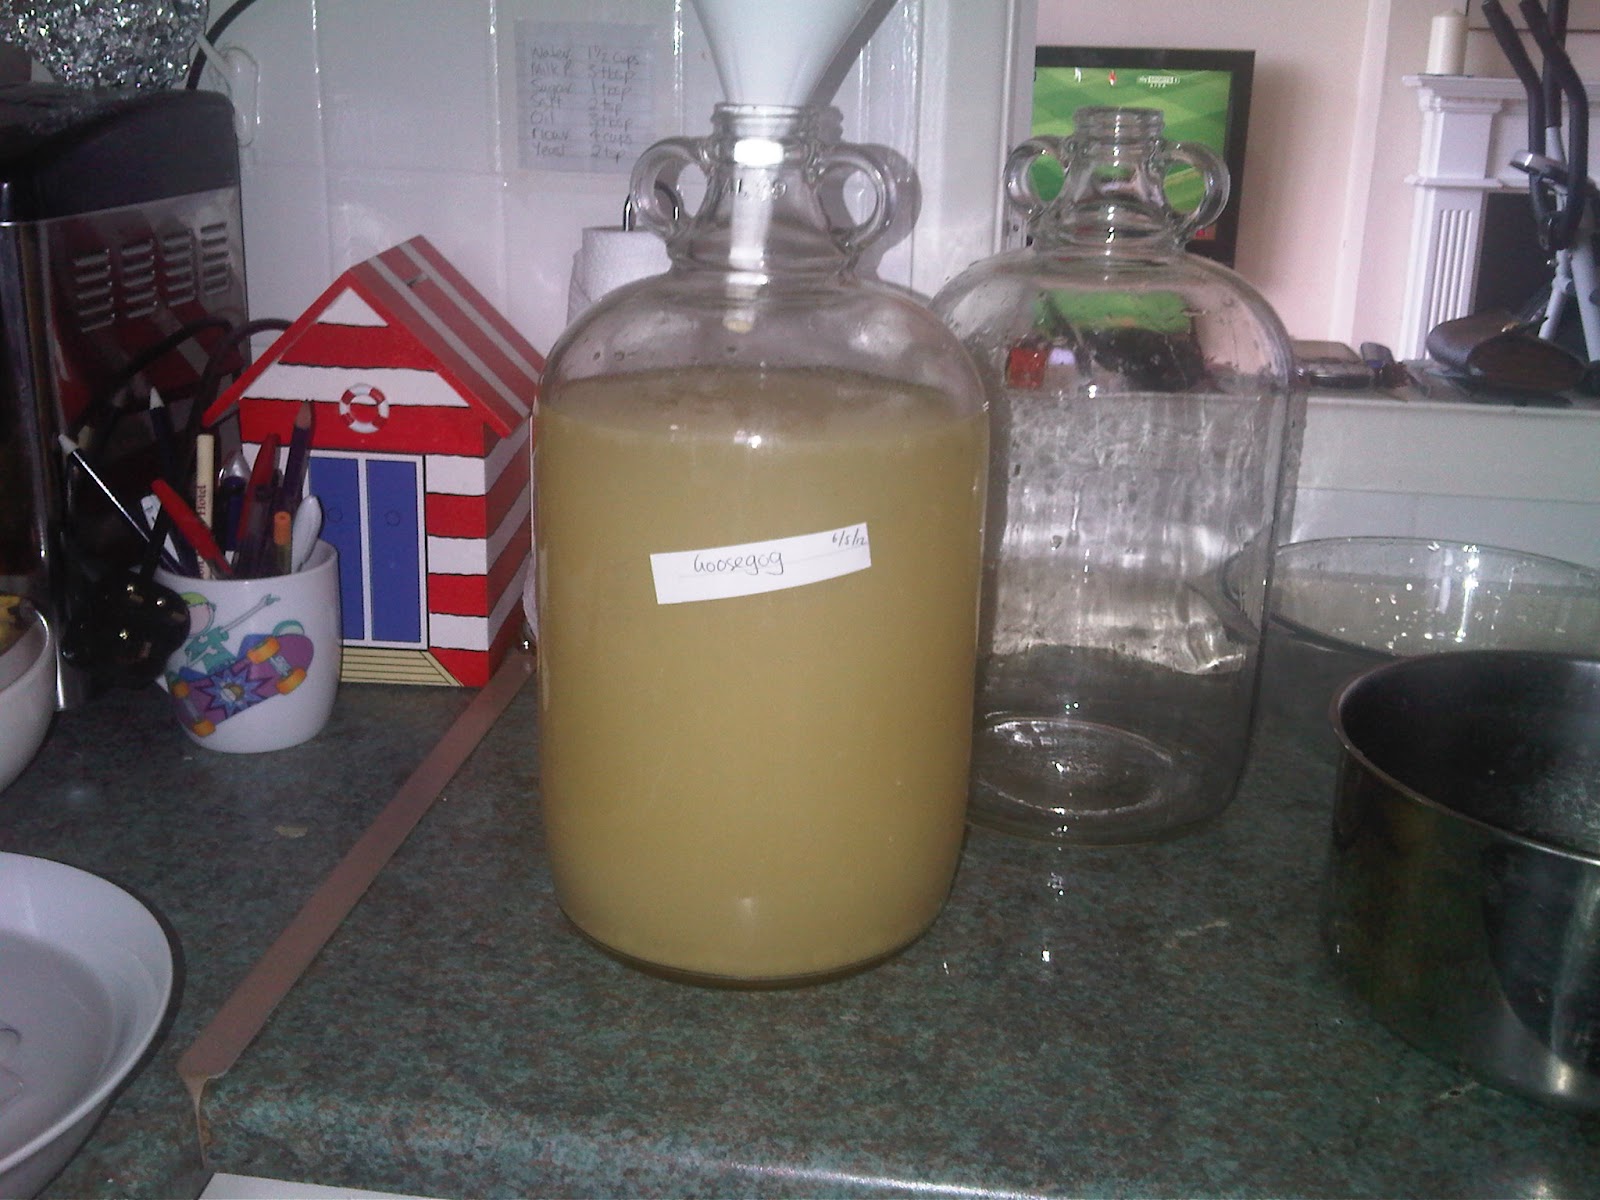
We sowed loads of parsnips in the garden early this year, hoping for a good crop for roast dinners and a few for wine. Sadly, they were all stunted, so not enough for roasts and wine.
A couple of days ago, I popped into the local co-op, only to find they had several bags of parsnips reduced to 45p a bag. Perfect! I snapped up the whole lot.
There are loads of parsnip wine recipes available, each with their own ingredients and methods. I've hit that point where I'm not going to worry too much: just do it.
If I had more time, I would have made 3 separate batches using 3 different recipes to see which came out the best, but for now, this will do the job.
Ingredients:
9lbs parsnips
9lbs sugar
1.5lbs sultanas
2 very ripe bananas
6 tablespoons lemon juice
1 mug (approx half pint) strong black tea (for tannin)
3 teaspoons pectolase
3 teaspoons yeast nutrient
2 teaspoons Youngs wine yeast
Loads of water
Step 1:
Slice the parsnips and boil in water and strain liquid into bucket
Dissolve sugar in boiling water and add to bucket
Simmer sultanas and pour into bucket
Mash bananas and add to bucket
Add lemon juice and tea to bucket
Top bucket up to 15litre mark
Allow to cool to room temperature and then add pectolase and stir well
Cover the bucket and leave for 24 hours
The parsnips should be brought to the boil for about 10 minutes, until they're soft but not mushy. If they go mushy, the wine won't clear. I'm not too worried as I have a Harris wine filter, so can always try that if I need to.
15 litres is more than 3 gallons. There will be a lot of sediment, plus the sultanas, so when it comes to racking off I should have 3 gallons of liquid.
Apparently the bananas add body to the wine, as do the sultanas. Most recipes use raisins for parsnip wine, currants for red wines and sometimes sultanas for other whites. I used sultanas as they were another thing at bargain price in the co-op.
I'm not sure what benefit the lemon juice and tannin will bring - we'll find out in maybe a year's time!
Note: As with carrot wine, the sliced and boiled parsnips are strained, bagged and frozen to be used in stews and casseroles throughout the year.
Step 2:
Measure SG
Add yeast nutrient and yeast
Stir well, cover and leave for 7 days.
Step 3:
Strain into clean, sterilised demijohns.
Fit airlocks, leave until fermentation finished (test SG regularly)
Step 4:
Rack off into clean demijohns and stabilise
Rack off again maybe 2 months later
Leave in demijohn until clear
Step 5:
Bottle!
Well .... that's the plan .... Hopefully it'll clear on it's own and be drinkable about this time next year. If it doesn't clear, I'll run it through the filter and see what happens.
Tuesday, 20 November 2012
Sunday, 21 October 2012
Saturday, 20 October 2012
Sunday, 26 August 2012
Sunday, 19 August 2012
Wednesday, 15 August 2012
Monday, 13 August 2012
Sunday, 5 August 2012
Plum Wine 2
Started 5th August 2012
The 'wild' plum tree down the street is really well loaded with plums. Many were ripe and dropping from the tree, so last night we popped out and grabbed some. The plums are quite small and there are plenty left so we should get another gallon or two started sometime soon.
Apparently, our first plum wine had too much sugar because plums have a lot of sugar in them already. Also, plums apparently don't have much flavour for wine, so I've used more plums this time.
Because plums are big, I've used a big bucket this time, to ensure we get the full gallon of liquid in the bucket with the fruit pulp.
The recipe below is temporary and will be adjusted later when I have more time.
Plum Wine 2
Ingredients: *
4.5lbs plums (after stones removed)
3lbs sugar
5 pints water
2 teaspoons pectolase
1 teaspoon yeast nutrient
1 teaspoon Youngs wine yeast
Step 1:
Stone the plums and put in bucket
Dissolve 3lbs sugar in 5 pints water and allow to cool
When cool, add to bucket
Add pectolase to bucket
Stir well, cover, leave for 24 hours
Step 2:
Add yeast nutrient and yeast to bucket
Stir well, leave for 6 days
Step 3:
Strain liquid into clean, sterilised demijohn
Measure SG
Friday, 27 July 2012
Mondego Reserve Medium Dry White Kit 1
Started 30th July 2012
We popped into Wilko's a couple of weeks ago and found these wine kits for just £12 each. They claim to make 30 bottles in less than 14 days, so we've got to try one and see what happens!
The kit is essentially a big can of concentrated grape juice with sachets of yeast, nutrient, stabiliser and finings under the lid. All we need is 3.5kg (about 7lbs) of sugar and a few gallons of water. What could be simpler than that?
A 5kg bag of sugar in Sainsburys is just £3.99. Therefore 3.5kg of sugar costs £2.80.
That makes the total cost of this kit just £14.80
For 30 bottles, that should work out to just 49.3p per bottle. That is 10% of the cost of ordinary shop bought wine when it's on offer!
We have the red version of this wine too, so we'll try that once the white has finished.
Update 5th August 2012
The instructions in the kit say it should ferment out in just 7 days. It's now 9 days. I took a hydrometer reading today and it's at 1.030, so the ferment is nowhere near finished. Disappointing considering the claims in the instructions. I'll check the SG again next weekend.
Raspberry Wine - Love It!
We're just finishing the last of our first Carafe 21 Red and Carafe 21 White kits. Both were very drinkable. The red definitely improved over the few weeks since bottling. We have about 1 bottle of each left.
Our second Carafe 21 Red will be bottled on Sunday evening. We stabilised it a couple of days ago and we'll be racking off tonight and adding the finings.
To help make the Carafe kits last this long, we've opened some of the raspberry wine. It is amazing! It tastes so much nicer than any shop bought wines and we're definitely going to make some more.
Raspberry wine 1 is very nice. It's fairly dry, with just enough sweetness. The raspberry flavour really comes through. It's mellowed a lot since we bottled it. If we had enough of it, I would drink it every day.
Raspberry wine 2 is very good too, but much sweeter than raspberry wine 1. It's more of a really good dessert wine. It's a bit too sweet to drink every night. It's really nice 50% wine and 50% soda water, still a good raspberry taste but not so sweet.
The reason raspberry wine 2 is sweeter than raspberry wine 1 is that raspberry wine 2 was made with currants, which have a lot more sugar than grape juice. That meant that raspberry wine 2 should have been left to ferment longer. Unfortunately, being beginners, we didn't think to test the SG before stabilising. But never mind!
It's been a really good learning experience for us and we've decided we like raspberry wine so much that we're going to plant more raspberries in our garden. We've picked and frozen a few pounds of home grown raspberries so far this year, so we can make a couple of gallons from that (probably with a mix of loganberries in there too).
But before I put any more raspberry canes in the ground, I need to crack on and get even more wines started ....
Monday, 9 July 2012
Carrot Wine 2
Started 9th July 2012
I nipped out to Sainsbury's yesterday for a couple of bits and spotted some bags of carrots reduced to clear, so for 30p, I picked up enough carrots for another gallon of wine.
Although the plan is to use mostly free fruit and veg, either home grown or foraged, I don't mind spending a few pennies here and there. In any case, carrots take months to grow and we now have several bags of sliced carrots in the freezer, ready to just bung into a stew in winter.
We're almost out of sultanas and raisins, so this time, we decided to use a small tin of white grape juice concentrate instead. We would rather use the sultanas if we have them, especially as most carrot wine recipes use sultanas, but CJJ Berry uses concentrate in his carrot wine recipe, so we have too.
The method for this carrot wine recipe is a bit different to the previous carrot wine. No special reason for this, it's just how we did it this time.
Carrot Wine 2
Ingredients:
4lbs carrots
2lbs sugar
1 x 245g tin white grape juice concentrate
1 cup strong black tea (for the tannin)
3 tablespoons lemon juice
1 teaspoon Youngs wine yeast
Step 1:
Add sugar to bucket
Slice the carrots - do not peel or grate them
Boil the carrots for about 20 mins until soft but not mushy
Strain the liquid from the carrots into the bucket to dissolve the sugar
Allow to cool to about 25C or less (5 or 6 hours)
Step 2:
Add the concentrate to the bucket
Add the lemon juice to the bucket
Add the tea to the bucket
Add yeast to bucket and stir well
Cover and leave for 10 days, stirring every day
Step 3:
Strain through a sieve into clean, sterilised demijohns
Fit airlocks
Store in a warm place until fermentation has finished
Step 4:
Rack off into clean demijohns
Leave in cooler place for 6 months
Step 5:
Bottle and drink
Friday, 6 July 2012
WOW - Wurzel's Orange Wine (Breakfast Juice)
Started 6th July 2012
This is the second version of the WOW. The recipe can be found online here at Wurzel's Orange Wine. A more detailed recipe and instructions with lots of good photos can be found at The Homebrew Forum.
This time we've used Sainsburys Basics Breakfast Juice (a mix of orange and grapefruit juice) instead of the orange juice.
Carafe 21 Red Kit Number 2
Started 4th July 2012
We popped in Wilko's in Sutton at the weekend to pick up some more airlocks. They had Carafe 21 kits reduced from £19 to £12. As the previous Carafe 21 Red is going down quite nicely, we just had to get the only two on the shelves. Sadly, we forgot the airlocks.
The missus got hold of another 2 Carafe Red and 2 Carafe White kits from another Wilko's near her work. And she forgot the airlocks again.
We decided that this time we'd experiment a little bit. The kit comes with 1 litre of red grape / elderberry juice concentrate. We're going to add a small tin (245ml) of red grape juice concentrate. Hopefully this will give the wine a little bit more body.
Tuesday, 3 July 2012
WOW - Wurzel's Orange Wine 1
Started 3rd July 2012
This is a very quick and simple wine using cartons of fruit juice from supermarkets. It's known as Wurzel's Orange Wine (or WOW for short), after the author who is known as Wurzel.
We've been making quite a lot of wine, but it takes time to ferment and clear and mature, so decided we'd have a go at some WoW to help tide us over. We had a trip to Sainsbury's yesterday and they had white grape juice on offer, so we picked up a few cartons with a few cartons of orange juice as well.
The recipe can be adapted to use other flavoured carton juice. We started 3 gallons of orange WoW today and we'll start one with a different flavoured juice very soon.
I won't repeat the recipe or method here. The recipe can be found online here at Wurzel's Orange Wine. A more detailed recipe and instructions with lots of good photos can be found at The Homebrew Forum.
Sunday, 1 July 2012
Carrot Wine 1
Started 1st July 2012
The local fox raided our tubs of carrots, probably hunting for slugs. Most of our home grown carrots had been dug up, most of them still small, baby carrots. So we decided we might as well make our first carrot wine.
In our ideal world, all our wines will be from home grown or foraged foods - we wouldn't normally buy any fruit or veg to make wine with. But as we only had about 1.5lbs of our own carrots, we bought a couple of bags of cheap carrots while we were out today. 1.5kgs (approx 3lbs) of carrots are only 69p in Morrisons, so not a big expense.
This is a basic carrot wine recipe for 2 gallons. It takes about a year for the wine to clear and be drinkable, so we'll see how it turns out. Some recipes use sultanas, which can give some extra body to the wine, others don't. We decided we would do this, but we didn't have enough sultanas, so used a mixture of sultanas and currants.
Carrot Wine 1
Ingredients:
8lbs carrots
4lbs sugar
1lb currants
1/2lb sultanas
1 pint strong black tea (for the tannin)
6 tablespoons lemon juice
2 teaspoons Youngs wine yeast
Step 1:
Add sugar to bucket
Slice the carrots - do not peel or grate them
Boil the carrots for about 20 mins until soft but not mushy
Strain the liquid from the carrots into the bucket to dissolve the sugar
Add the currants and sultanas to the bucket
Add the lemon juice to the bucket
Add the tea to the bucket
Stir well, cover and leave for 12 hours
Step 2:
Add yeast to bucket and stir well
Cover and leave for 10 days, stirring every day
Step 3:
Strain through a sieve into clean, sterilised demijohns
Fit airlocks
Store in a warm place until fermentation has finished
Step 4:
Rack off into clean demijohns
Leave in cooler place for 6 months
Step 5:
Bottle and drink
Saturday, 23 June 2012
Plum Wine 1
Started 22nd June 2012
I had a bag of last year's plums in the freezer, so thought it was best to get these turned into wine. The plums are a mix of Czar, Victoria and cherry plums. Local trees are full of cherry plums, so will be making loads more plum wine very soon.
Plums have a high sugar content so we don't need to use as much sugar as with other wines. Unfortunately I started this wine without realising how much sugar to use, so it started with a very high sugar content.
Plums also have a high pectin content which seems to cause a pectin haze. There seem to be various ways to prevent the pectin haze. One is to use extra pectolase before the yeast is added to the bucket. Another (apparently) is to start the wine with cold water, rather than boiling water.
Whichever methods we choose, mixing the ingredients makes wine. I like dissolving the sugar in warm water before adding it to the fruit pulp, so I've done that again, but waited until the sugar water had cooled before adding it to the bucket.
NOTE - I started this wine before considering the quantities of ingredients. The recipe is "wrong" so needs adjusting as I go along. I will make more plum wines
Plum Wine 1
Ingredients: *
3lbs plums (after stones removed)
3lbs sugar
5 pints water
2 teaspoons pectolase
1 teaspoon yeast nutrient
1 teaspoon Youngs wine yeast
* This was just a "random" start - there is too much sugar and not enough liquid in this - it was enough to fill the small bucket to the 1 gallon / 4.5 litre mark - adjustments will be made during the various steps.
Step 1:
Stone the plums and put in bucket
Dissolve 3lbs sugar in 5 pints water and allow to cool
When cool, add to bucket
Add pectolase to bucket
Stir well, cover, leave for 24 hours
Step 2:
Add yeast nutrient and yeast to bucket
Stir well, leave for 6 days
Step 3:
Strain liquid into clean, sterilised demijohn
Measure SG
Sunday, 10 June 2012
Elderflower Cordial
Started 9th June 2012
Ok, so it's not a wine, but it's another drink we're making using ingredients from home, so I'm adding it here.
We looked at several recipes for elderflower cordial. They were all very similar, but with different quantities of water and sugar. The one thing we weren't sure of was how many elderflowers we needed. Each recipe said how many elderflower heads to use, but not what size the elderflower heads should be - a large head could be twice the size of a medium or smaller one.
In the end we gave up trying to find out, and just made the cordial. We had enough elderflower heads for 2 batches of cordial.
Elderflower Cordial
Ingredients:
25-30 elderflower heads (don't worry about the size!)
3 pints water
2.2lbs sugar
2 lemons
2 oranges
2oz citric acid
Step 1:
Put elderflower heads in the bucket
Put sugar and water in pan and bring to the boil
While this is coming to the boil, zest the oranges and lemons, slice them, add the zest and slices to the bucket
Pour the boiling sugared water into the bucket
Add the citric acid and stir
Cover and leave for 24 hours
Step 2:
Strain through muslin or J-cloth into clean plastic bottles.
The bottles can be kept in the freezer until ready to use. Apparently the citric acid should help it keep longer if stored in a cool dark cupboard, but we have a big chest freezer so we'll use that instead. The cordial can be served diluted with water, still or sparkling and slices of lemon etc.
Verdict:
Lovely! Even my 15yo son, who is extremely wary of anything new or home made, really enjoyed it. He brought his girlfriend round just to try it too. We did have to label it "squash" for him though .....
Now all we need is for some nice warm sunny weather to really enjoy it, instead of the cold wet miserable weather we still have ....
Elderflower Wine 1
Started 9th June 2012
The trees are covered in elderflower at the moment. Elderflowers should be picked on a warm, dry sunny day when the flowers are all open. We've had some pretty cold, wet miserable weather recently, but the sun shone today so we picked the best part of a full carrier bag.
We want elderflower wine and elderflower cordial, so we started just the one gallon of wine today and used the rest of the elderflowers for cordial.
We've seen numerous recipes for elderflower wine, some using pineapple juice or grape juice. For this batch, we've chosen to to go with a very basic recipe for elderflower wine - it'll be good to have a normal elderflower wine before we start experimenting with different fruit juices in it.
Elderflower Wine 1
Ingredients:
3oz fresh elderflowers (snipped from stalks)
3.5lbs sugar
6 pints water
0.5lbs sultanas
6 tablespoons lemon juice
Grape tannin *
1 teaspoon yeast nutrient
1 teaspoon yeast
* We don't have any tannin, so we used 1/2 cup of strong black tea
Step 1:
Snip elderflowers off stalks and put in bucket
Disolve 3.5lbs sugar in 4 pints water and bring to the boil then add to bucket (straight from the boil)
Put sultanas in a pan with 2 pints water and bring to the boil, simmer 20 mins, add to bucket (straight from the boil)
Add lemon juice to bucket
Cover bucket and leave overnight to cool
Step 2:
When cool, add tannin, yeast nutrient and yeast
Stir, cover, leave to ferment in a warm place for 5 days
Step 3:
Strain through a muslin bag or J-cloth into a demijohn
Top up with cold water
Fit bung and airlock, leave to ferment
Step 4:
When the wine has cleared, syphon into a new demijohn, leaving the sediment behind
Fit bung and airlock, leave for 2 months
Step 5:
Syphon off into bottles
Monday, 4 June 2012
28 Gallons
We now have about 28 gallons of wine in various stages, demijohns and buckets all over the place.
Our Carafe 21 Kits will be ready this weekend. They're supposed to be ready in 21 days, providing a temperature of 25C is maintained. It's been a fair bit lower, so the wine has taken longer. The SG is now below 1000, so we added the fermentation stopper yesterday. We need to stir it for a couple of days, then syphon it off and add the finings in 2 days time. The wine should be drinkable by Saturday so we'll need to get 60 bottles ready.
The next wines that should be ready are the first 2 raspberry wines. They've been in demijohns for 6 weeks now and we're still seeing the occasional blip in the airlocks. Again, temperatures have been lower than ideal, so it's taken longer. On the plus side, as we have the Carafe 21 Kits we're not in any major hurry. However, the sooner they're ready, the sooner we'll have more demijohns and airlocks ready for the next batch.
The elderflower tree at the bottom of the garden has over 100 bunches of flowers so we'll pick some today. We spotted a few elderflower / elderberry bushes / trees on the common yesterday, but it really was only a few. The mother-in-law has a big elderberry tree in her garden, so we'll have some flowers or berries off that too. Ideally we want to get the flowers wherever we find them and get the berries from our garden.
We still have some plums and gooseberries from last year in the freezer. We'll turn these into wine when we get a chance. It's only a case of space for the buckets and getting the old demijohns cleaned out properly - many are still filthy inside and not coming clean easily.
The gooseberries in the garden are packed with fruit so we'll have loads more to turn into wine. From what I've read, gooseberry wine should stay in the demijohns for several months. If they're being used for one type of wine, they can't be used for other types. Luckily we have about 36 demijohns, so hopefully we won't run out of demijohns.
Raspberries and loganberries in the garden are doing well too. Should have a pretty good haul from these. Our new blackcurrant bush has some fruit, the red and white currants are growing, but not fruiting. Our first grape vine has started growing.
We've found loads of cherry plum trees out in the local streets, including our own street. We should get a massive haul of free fruit from these this year. I must look up to find out if they're good for wine - fingers crossed that they are!
We've been on the lookout for other free fruits and berries to pick from the common, in particular we'd like to find sloes. There are loads of brambles and a few elderberry trees, but no luck on the sloes or anything else.
I'd better get cracking on other things now ....
Dried Elderberry Wine 2
Started 3rd June 2012
We're using the pulp from the first (3 gallon) batch of elderberry wine to make a second batch. There was a LOT of fruit in the first batch and the berries still look whole, so we've decided to try and make 2 gallons in the second batch. This time we'll crush the fruit with a potato masher in the bucket to try and extract more juice and flavour.
We're still beginners so this is still an experiment. We're not sure if we need to add any yeast or if it'll have enough yeast left over in the fruit pulp, so we're going to give it a go without adding yeast for now, just to see what happens. Likewise we're not sure if we need new yeast nutrient or other chemicals.
Dried Elderberry Wine
Ingredients:
Fruit pulp from previous batch of elderberry wine
5lbs sugar
2 gallons water
2 teaspoons citric acid
1 teaspoons pectolase
2 teaspoons yeast nutrient
Step 1:
Put fruit pulp in bucket, mash with potato masher
Add 8 pints (1 gallon) water
Add 2 teaspoons citric acid
Add 1 teaspoon pectolase
Add 2 teaspoons yeast nutrient
Disolve 5lbs sugar in 8 pints water (do this in smaller batches), bring to the boil for a couple of minutes, allow to cool, then add to bucket
Cover, leave for 7 days, stirring once a day
Step 2:
Strain liquid into demijohns, add bungs and airlocks, leave to ferment until clear.
SCRAPPED - 13th June 2012
When we strained out into the demijohns, the liquid was a dirty brown colour and had a horrible smell that I can only describe as "sweet sewage". The fruit pulp was dripping a liquid that looked like strong tea with a drop of milk. We decided that we would never drink it - we were put off by the colour and smell. But we did pour it into demijohns for a day or so just to see if it was fermenting, and yes, it was bubbling furiously. We poured it down the sink today.
Apparently this is normal from a second ferment when using elderberries. Apparently the milky liquid coming off the pulp was due to yeast in suspension. Apparently we could have let it ferment the same as any other wine, but let it mature for a year. However, the colour and smell was too much for us. We have loads of other fruit growing which produce a lovely smelling wine with really good colours. Can't imagine wanting smelly brown liquid turning into something drinkable!
Wednesday, 23 May 2012
Dried Elderflower Wine 1
Started 20th May 2012
We have a small packet of dried elderflowers which should make a couple of gallons of a nice white wine. You only need a small quantity of dried elderflowers to make a gallon of wine - depending on the recipe, anything from 1/2oz to 1oz. We've chosen a 1oz recipe. If making from freshly picked elderflowers, you'll need 6x the quantity of elderflowers.
We have made 2 gallons of this wine in separate buckets. We can't guarantee the quantities used are exactly the same, so the two gallons might turn out completely differently. Just have to wait and see.
Elderflower Wine 1
Ingredients:
1oz dried elderflowers
3lb sugar
0.5lb sultanas
8 tablespoons lemon juice*
1 teaspoon grape tannin**
1 gallon water
1 teaspoon yeast nutrient
1 teaspoon white wine yeast
* we have citric acid - one teaspoon citric acid is equivalent to the juice of one lemon - information elsewhere suggests one lemon has about 3 tablespoons of lemon juice - therefore we are using 3 teaspoons citric acid
** we don't have grape tannin, so we are using half a cup of strong cold tea (no milk or sugar) instead
Step 1:
Put elderflowers in the bucket
Disolve sugar in boiling water and pour into the bucket
Simmer the sultanas in water for 30 minutes and pour into bucket
Add lemon juice / citric acid to bucket
Cover and leave for 24 hours
Step 2:
Add tannin, yeast nutrient and yeast to the bucket
Cover and leave for 5 days
Step 3:
Strain into demijohn
Fit bung and airlock, leave to ferment until clear
Step 4:
When the wine is clear, siphon the wine off into another demijohn.
Leave for 2 months
Step 5:
The wine should be clear now and the fermenting should have stopped.
Siphon off into bottles.
We have a small packet of dried elderflowers which should make a couple of gallons of a nice white wine. You only need a small quantity of dried elderflowers to make a gallon of wine - depending on the recipe, anything from 1/2oz to 1oz. We've chosen a 1oz recipe. If making from freshly picked elderflowers, you'll need 6x the quantity of elderflowers.
We have made 2 gallons of this wine in separate buckets. We can't guarantee the quantities used are exactly the same, so the two gallons might turn out completely differently. Just have to wait and see.
Elderflower Wine 1
Ingredients:
1oz dried elderflowers
3lb sugar
0.5lb sultanas
8 tablespoons lemon juice*
1 teaspoon grape tannin**
1 gallon water
1 teaspoon yeast nutrient
1 teaspoon white wine yeast
* we have citric acid - one teaspoon citric acid is equivalent to the juice of one lemon - information elsewhere suggests one lemon has about 3 tablespoons of lemon juice - therefore we are using 3 teaspoons citric acid
** we don't have grape tannin, so we are using half a cup of strong cold tea (no milk or sugar) instead
Step 1:
Put elderflowers in the bucket
Disolve sugar in boiling water and pour into the bucket
Simmer the sultanas in water for 30 minutes and pour into bucket
Add lemon juice / citric acid to bucket
Cover and leave for 24 hours
Step 2:
Add tannin, yeast nutrient and yeast to the bucket
Cover and leave for 5 days
 |
| Dried Elderflower Wine |
Strain into demijohn
Fit bung and airlock, leave to ferment until clear
Step 4:
When the wine is clear, siphon the wine off into another demijohn.
Leave for 2 months
Step 5:
The wine should be clear now and the fermenting should have stopped.
Siphon off into bottles.
Sunday, 20 May 2012
Dried Elderberry Wine 1
Started 20th May 2012
We had 1.5lbs of dried elderberries, so we decided to get this on the go today. The sooner it's started, the sooner we can drink it. Various elderberry wine recipes suggest it could take anything from a few weeks to several months, and most suggest it improves with age, so we'll see how it goes. 1.5lbs of dried elderberries is enough for 3 gallons of wine.
We can make a second (smaller) batch from the pulp of the first batch. Re-using pulp with the same quantities of water and sugar will make a lighter wine, but if we go for half quantities of water and sugar, it should be better.
Recipes tend to recommend a Bordeaux or Burgundy yeast. We don't have a winemaking shop nearby - the closest is about 10 miles away - so we tend to just use ordinary red wine yeast from Wilkinsons. We could order online, but we're still beginners so would prefer to buy any "special" yeasts etc from a proper winemaking shop so that we can get good advice at the time.
Note for step 1 - This recipe required disolving sugar in water, boiling elderberries, simmering currants etc. We don't have cooking pots big enough to do it all in one go, so we did it all in smaller batches until it was all in the bucket.
Dried Elderberry Wine 1
Ingredients:
1.5lbs dried elderberries
7.5lbs sugar
3 gallons water
1.5lbs currants (or 750ml red grape juice concentrate)
3 teaspoons citric acid
3 teaspoons pectolase
3 teaspoons yeast nutrient
Red wine yeast
Step 1:
Disolve 1.5lbs sugar in 3 pints water, add some elderberries, bring to the boil for a couple of minutes, empty into bucket. Repeat 4 more times.
Put 1lb currants in 3 pints water, bring to boil and simmer for 30 minutes, then add to bucket. Repeat twice more.
Cover bucket and leave to cool for 24 hours
Step 2:
Add citric acid, pectolase, yeast nutrient and yeast to the bucket.
Stir well, cover bucket.
Stir every day for a week, pushing the fruit pulp down into the bucket.
Step 3:
Strain liquid into demijohns, add bungs and airlocks, leave to ferment until clear.
Rack and bottle.
Results so far:
When making big batches of wine in this way, waiting for water to boil etc, it's easy to lose count of how many pounds of sugar you've added. Tip - don't do it when other people can distract you.
This wine actually stayed in the bucket for 2 weeks, mainly because we simply didn't have time to strain it last weekend.
There was so much fruit in this bucket, it bubbled over out of the bucket, leaving a sticky tar-like mess everywhere. On the plus side, the mess was quite easy to clean up.
We had 1.5lbs of dried elderberries, so we decided to get this on the go today. The sooner it's started, the sooner we can drink it. Various elderberry wine recipes suggest it could take anything from a few weeks to several months, and most suggest it improves with age, so we'll see how it goes. 1.5lbs of dried elderberries is enough for 3 gallons of wine.
We can make a second (smaller) batch from the pulp of the first batch. Re-using pulp with the same quantities of water and sugar will make a lighter wine, but if we go for half quantities of water and sugar, it should be better.
Recipes tend to recommend a Bordeaux or Burgundy yeast. We don't have a winemaking shop nearby - the closest is about 10 miles away - so we tend to just use ordinary red wine yeast from Wilkinsons. We could order online, but we're still beginners so would prefer to buy any "special" yeasts etc from a proper winemaking shop so that we can get good advice at the time.
Note for step 1 - This recipe required disolving sugar in water, boiling elderberries, simmering currants etc. We don't have cooking pots big enough to do it all in one go, so we did it all in smaller batches until it was all in the bucket.
Dried Elderberry Wine 1
Ingredients:
1.5lbs dried elderberries
7.5lbs sugar
3 gallons water
1.5lbs currants (or 750ml red grape juice concentrate)
3 teaspoons citric acid
3 teaspoons pectolase
3 teaspoons yeast nutrient
Red wine yeast
Step 1:
Disolve 1.5lbs sugar in 3 pints water, add some elderberries, bring to the boil for a couple of minutes, empty into bucket. Repeat 4 more times.
Put 1lb currants in 3 pints water, bring to boil and simmer for 30 minutes, then add to bucket. Repeat twice more.
Cover bucket and leave to cool for 24 hours
Step 2:
Add citric acid, pectolase, yeast nutrient and yeast to the bucket.
Stir well, cover bucket.
Stir every day for a week, pushing the fruit pulp down into the bucket.
 |
| Dried Elderberry Wine |
Strain liquid into demijohns, add bungs and airlocks, leave to ferment until clear.
Rack and bottle.
Results so far:
When making big batches of wine in this way, waiting for water to boil etc, it's easy to lose count of how many pounds of sugar you've added. Tip - don't do it when other people can distract you.
This wine actually stayed in the bucket for 2 weeks, mainly because we simply didn't have time to strain it last weekend.
There was so much fruit in this bucket, it bubbled over out of the bucket, leaving a sticky tar-like mess everywhere. On the plus side, the mess was quite easy to clean up.
Monday, 7 May 2012
Carafe 21 White Kit
Started 7th May 2012
Carafe 21 comes in both red and white. I'm not keen on white wine, but the missus likes white wine in the summer, red in winter.
30 bottles of white in 21 days sounds pretty good to me, so we've given this one a go too. If the missus doesn't like it for drinking, she'll use it for cooking.
The kit containes all the ingredients except the water and sugar. You also need a big 5 gallon bucket.
It helps to have a hydrometer - you have to test the gravity at 12-16 days to check the ferment has finished. If the gravity is below 1000 after 16 days, it's ready for the next stage. If not, you have to wait longer for the ferment to finish, which means the wine will take longer than 21 days.
From what I understand (which isn't a great deal at the moment!) there's no real harm in moving on to the next stage sooner - it just means the wine will be sweeter and less alcoholic as some of the sugar won't have fermented.
It's also handy to have a thermometer. The instructions say to dissolve sugar in water and pour into the bucket - the easiest way is to do this in a pan on the cooker, but that means you end up with warm water. If the water / liquid is too warm, there's no point adding the other ingredients, especially the yeast - heat will kill the yeast and the best you get is mould growing on the fruity liquid. A long thermometer only costs a few quid.
The buckets are on the go now, we need to add more water and sugar tomorrow then leave for another 9 days .... fingers crossed!
Verdict:
Bottled this 11th June 2012. Like the Carafe Red, it took a bit longer than expected.
We got 26 bottles out of it, so I definitely miscounted when adding the water.
On the plus side, it tastes really good. I'm not a lover of white wine, but this is a very good white, definitely as good or better than some of the well known labels in supermarkets. It could be that it tastes better because I was short on the water, but can only tell if I do another kit.
Would we buy it again? Absolutely!
Other home made white wines like gooseberry wine can take several months to mature, sometimes over a year, but this is ready in just a few weeks and it's really good.
Carafe 21 comes in both red and white. I'm not keen on white wine, but the missus likes white wine in the summer, red in winter.
 |
| Carafe 21 White Kit |
The kit containes all the ingredients except the water and sugar. You also need a big 5 gallon bucket.
It helps to have a hydrometer - you have to test the gravity at 12-16 days to check the ferment has finished. If the gravity is below 1000 after 16 days, it's ready for the next stage. If not, you have to wait longer for the ferment to finish, which means the wine will take longer than 21 days.
From what I understand (which isn't a great deal at the moment!) there's no real harm in moving on to the next stage sooner - it just means the wine will be sweeter and less alcoholic as some of the sugar won't have fermented.
It's also handy to have a thermometer. The instructions say to dissolve sugar in water and pour into the bucket - the easiest way is to do this in a pan on the cooker, but that means you end up with warm water. If the water / liquid is too warm, there's no point adding the other ingredients, especially the yeast - heat will kill the yeast and the best you get is mould growing on the fruity liquid. A long thermometer only costs a few quid.
The buckets are on the go now, we need to add more water and sugar tomorrow then leave for another 9 days .... fingers crossed!
Verdict:
Bottled this 11th June 2012. Like the Carafe Red, it took a bit longer than expected.
We got 26 bottles out of it, so I definitely miscounted when adding the water.
On the plus side, it tastes really good. I'm not a lover of white wine, but this is a very good white, definitely as good or better than some of the well known labels in supermarkets. It could be that it tastes better because I was short on the water, but can only tell if I do another kit.
Would we buy it again? Absolutely!
Other home made white wines like gooseberry wine can take several months to mature, sometimes over a year, but this is ready in just a few weeks and it's really good.
Carafe 21 Red Kit
Started 7th May 2012
We took a trip to Kingston for a pub lunch and took the opportunity to pop in Wilkinsons. There aren't many shops selling homebrew kit, but we know Wilkinson's does, so we had to see what they had. They had a small range of basic chemicals and "bits" like airlocks, a few "quick" kits.
 One
kit we found there was the Carafe 21 kit - makes 30 bottles of red in
21 days. As our fruit wines will take several weeks at least, this
seemed like a good idea. Even better, we already had a 5 gallon bucket
for it.
One
kit we found there was the Carafe 21 kit - makes 30 bottles of red in
21 days. As our fruit wines will take several weeks at least, this
seemed like a good idea. Even better, we already had a 5 gallon bucket
for it.
It seems to be a fairly simple kit - nothing difficult - just follow the instructions. It's all done in the one bucket, no straining, no racking, no nonsense. The kit includes everything needed except the bucket, the water and the sugar.
Getting started was easy - it's sitting there in the bucket, hopefully only 3 weeks left. It's been fairly chilly weather though, and we haven't had the heating up high, so it's not been too warm indoors - therefore it might take a bit longer to ferment. We need to test the gravity (with our hydrometer) in about 12 days time.
After we'd started the kit, the missus checked up on the Internet for reviews of this kit - she said all the reviews were good, no complaints, everyone seems happy. All sounds good to me!
Cost £19.00 + about 10lbs sugar (£3.99 for 5k /11lb bag)
= approx £23.00 for 30 bottles
= approx £0.77 per bottle
Verdict:
The wine is ready in 21 days, IF the temperature is a constant 25C. It's been a bit chilly here and we haven't had the heating on, so it's taken longer to finish fermenting. We finally bottled this on 10th June 2012.
We didn't quite get 30 bottles out of it, maybe 29, but we may not have been as careful as we should have been with the measurements. And of course we had to fill a few glasses while bottling.
It's a fairly basic red table wine, nothing special, but very passable. It doesn't touch a nice Shiraz, but we're happy with it, especially as it's far less than £1 a bottle.
Would we buy it again? Yes, but probably only if we're likely to run out of our fruit wines.
We might try other kits later too ....
We took a trip to Kingston for a pub lunch and took the opportunity to pop in Wilkinsons. There aren't many shops selling homebrew kit, but we know Wilkinson's does, so we had to see what they had. They had a small range of basic chemicals and "bits" like airlocks, a few "quick" kits.

It seems to be a fairly simple kit - nothing difficult - just follow the instructions. It's all done in the one bucket, no straining, no racking, no nonsense. The kit includes everything needed except the bucket, the water and the sugar.
Getting started was easy - it's sitting there in the bucket, hopefully only 3 weeks left. It's been fairly chilly weather though, and we haven't had the heating up high, so it's not been too warm indoors - therefore it might take a bit longer to ferment. We need to test the gravity (with our hydrometer) in about 12 days time.
After we'd started the kit, the missus checked up on the Internet for reviews of this kit - she said all the reviews were good, no complaints, everyone seems happy. All sounds good to me!
Cost £19.00 + about 10lbs sugar (£3.99 for 5k /11lb bag)
= approx £23.00 for 30 bottles
= approx £0.77 per bottle
Verdict:
The wine is ready in 21 days, IF the temperature is a constant 25C. It's been a bit chilly here and we haven't had the heating on, so it's taken longer to finish fermenting. We finally bottled this on 10th June 2012.
We didn't quite get 30 bottles out of it, maybe 29, but we may not have been as careful as we should have been with the measurements. And of course we had to fill a few glasses while bottling.
It's a fairly basic red table wine, nothing special, but very passable. It doesn't touch a nice Shiraz, but we're happy with it, especially as it's far less than £1 a bottle.
Would we buy it again? Yes, but probably only if we're likely to run out of our fruit wines.
We might try other kits later too ....
Tuesday, 1 May 2012
New Wine Cabinet
We have a big collection of winemaking kit and buckets of wine on the floor in the dining room, which isn't really ideal. I suggested to the missus last week that we should get a cupboard for the dining room so we had somewhere to store the equipment and somewhere "dog proof" for the buckets of wine. She agreed.
While out shopping at the weekend, we took a minor detour to the British Heart Foundation shop in Wallington. We found a big pine computer cabinet that's ideal for a couple of big buckets of wine and various equipment. It's been well used and needs a bit of TLC to bring it up to scratch - the missus love restoring old furniture too, so that's another piece she can work on!
Gotta love the British Heart Foundation shops - they always have a really good collection of 2nd hand furniture and most is in very good condition. Some BHF shops, including the Wallington one, also sell cookers, TVs, fridges, washing machines and so on. Definitely worth a visit. And if you see something in one of their shops, snap it up quickly or someone else will!
Sunday, 29 April 2012
Raspberry, Loganberry & Redcurrant Wine 1
Started 30th April 2012
This wine was mainly about using up some remaining fruit from the freezer. We had about 1lb of raspberries and I found about 8oz of loganberries in there too, so decided to use those with 1lb or so of redcurrants to make another wine.
This one is a bit random and we didn't bother much about the exact quantities - it might be great, it might be awful - only one way to find out!
We also re-used some of the pulp from previous raspberry and redcurrant wine - the pulp still contains yeast, so no need to add any more.
Raspberry, Loganberry & Redcurrant Wine
Step 1:
Put 1lb raspberries, 0,5lb loganberries, 1.5lb redcurrants into bucket
Crush fruit
Dissolve 2.5lb sugar in 3 pints of water and add to bucket
Add 1 teaspoon pectolase to help break down the fruit and extract flavour
Simmer 0.5lb (500g) currants in 3 pints of water for 30 mins and add to bucket
Add a lump of pulp from a previous batch of wine
Add 1 teaspoon yeast nutrient
Cover and leave for 1 week
Note - this wine uses the yeast that already exists in the lump of pulp from the previous batch
This wine contains a lot of pulp so has less than 1 gallon of liquid. When this is strained into the demijohn, it will need topping up with water.
Step 2:
Strain through a sieve into a demijohn
Top up to 1 gallon
Fit bung and airlock and leave to ferment.
Results So Far:
It's a lovely colour, lovely smell. Nowhere near a gallon in the demijohn, probably only 6 pints at best. Not sure if we should top up or not, but we've decided not to. Just need to wait and see what happens ....
Gooseberry Wine 1
Started 30th April 2012
I'm not very keen on white wine, but the missus likes white wine in the summer. As we had about 16lbs of gooseberries in the freezer and loads of red wines started, we decided we should get some white wine on the go. Gooseberry wine seems to take a whole year to ferment and mature, so starting it now means it should be ready for next summer.
We used a slightly different method for the gooseberry wine. We crushed the gooseberries and soaked them in water for a week before straining and adding the sugar and yeast. This meant we were adding sugar and yeast to the fruit juice without the pulp. The idea was that firstly, without the fruit pulp, hopefully we could get a more precise specific gravity reading so we knew how much sugar to add, and secondly, that we'd have a full 1 gallon of liquid to transfer to the demijohns.
Gooseberry Wine 1
Step 1:
Top and tail 4lbs gooseberries into a bucket
Crush fruit
Add 1 teaspoon pectolase to break down the fruit and extract colour and flavour
Add 1 pint water
Cover and leave for 1 week, stirring and crushing again every couple of days
We used home grown gooseberries that we had picked last year and frozen. I've always found it easiest to top and tail gooseberries when they are frozen. Trying to top and tail ripe gooseberries can be very difficult - it's easy to squash them and make a mess. Frozen gooseberries don't get squashed and can be topped and tailed simply by scraping with a fingernail. The downside is cold fingers!
Step 2:
Strain the gooseberries through a sieve into another bucket. Squeeze the fruit pulp to get as much juice out as possible.
Dissolve 3lbs sugar in warm water and add to the gooseberry juice
Top bucket up to 4.5 litres (1 gallon)*
Test SG and add sugar if necessary to 1090
Add 1 teaspoon yeast nutrient
Add 1 teaspoon Champagne yeast
Cover and leave for a week
* At this stage, the SG reading was exactly 1090 - this is the ideal SG for starting wine - this is also the lowest SG reading we've had so far from our wines
Step 3:
Strain through sieve into demijohn
Top up to 1 gallon if required
Fit bung and airlock
Leave in demijohn for 6 months
Step 4:
Add finings to help clear the wine and leave for a week
Rack off into 2nd demijohn and leave for another 6 months *
We may want or need to use a filter at this stage, depending on how cloudy or hazy the wine is
Step 5:
Bottle and drink!
We're hopeful for this wine. It should be fairly dry, but we won't get to find out for another year ....
I'm not very keen on white wine, but the missus likes white wine in the summer. As we had about 16lbs of gooseberries in the freezer and loads of red wines started, we decided we should get some white wine on the go. Gooseberry wine seems to take a whole year to ferment and mature, so starting it now means it should be ready for next summer.
We used a slightly different method for the gooseberry wine. We crushed the gooseberries and soaked them in water for a week before straining and adding the sugar and yeast. This meant we were adding sugar and yeast to the fruit juice without the pulp. The idea was that firstly, without the fruit pulp, hopefully we could get a more precise specific gravity reading so we knew how much sugar to add, and secondly, that we'd have a full 1 gallon of liquid to transfer to the demijohns.
Gooseberry Wine 1
Step 1:
Top and tail 4lbs gooseberries into a bucket
Crush fruit
Add 1 teaspoon pectolase to break down the fruit and extract colour and flavour
Add 1 pint water
Cover and leave for 1 week, stirring and crushing again every couple of days
We used home grown gooseberries that we had picked last year and frozen. I've always found it easiest to top and tail gooseberries when they are frozen. Trying to top and tail ripe gooseberries can be very difficult - it's easy to squash them and make a mess. Frozen gooseberries don't get squashed and can be topped and tailed simply by scraping with a fingernail. The downside is cold fingers!
Step 2:
Strain the gooseberries through a sieve into another bucket. Squeeze the fruit pulp to get as much juice out as possible.
Dissolve 3lbs sugar in warm water and add to the gooseberry juice
Top bucket up to 4.5 litres (1 gallon)*
Test SG and add sugar if necessary to 1090
Add 1 teaspoon yeast nutrient
Add 1 teaspoon Champagne yeast
Cover and leave for a week
* At this stage, the SG reading was exactly 1090 - this is the ideal SG for starting wine - this is also the lowest SG reading we've had so far from our wines
 |
| Step 3 - lovely colour and smell |
Strain through sieve into demijohn
Top up to 1 gallon if required
Fit bung and airlock
Leave in demijohn for 6 months
Step 4:
Add finings to help clear the wine and leave for a week
Rack off into 2nd demijohn and leave for another 6 months *
We may want or need to use a filter at this stage, depending on how cloudy or hazy the wine is
Step 5:
Bottle and drink!
We're hopeful for this wine. It should be fairly dry, but we won't get to find out for another year ....
Blackberry Wine 2
After making the previous 4 gallons of blackberry wine, we had a lot of pulp in the buckets. We also had another 1lb of blackberries in the freezer. So we put the whole lot into the 15 litres bucket to make another 2 gallons of blackberry wine.
Blackberry Wine Recipe 2
Step 1:
Dissolve 5lbs sugar in warm water (do in smaller batches, like 2lbs in 3 pints of water) and add to 15 litre (3 gallon) bucket
Top up bucket to 10 litres (2 gallons) with cold water
Crush 1lb blackberries in small bucket and add to 15 litre bucket
Add 1 teaspoons yeast nutrient
Add pulp from previous 4 gallons of blackberry wine and stir well
Cover and leave for one week
 |
| Blackberry Wine 2 |
Strain through sieve into cleaned, sterilised demijohns
Fit bung and airlock to demijohn
Leave to ferment for a few weeks (maybe 6)
Result so far ....
Looks like it worked quite well. Putting the liquid in the bucket first meant we got a full 2 gallons in the demijohns and no need to top up with water. There was loads of pulp, all squeezed out to get as much juice as possible.
More Winemaking Kit
Last week we were offered some winemaking kit - lots of it - by a nice old chap called Ron. He had given up winemaking years ago and all his kit was stacked up in his loft doing nothing. We were very grateful for it!
I can't list everything, but among the items were:
7 or 8 buckets (up to 5 gallon)
17 demijohns
dozens of bottles
fermenting cabinet (for 3 demijohns)
5 or 6 immersible heaters
2 filters
loads of tubing, bungs, airlocks, corks, 2 corking machines
loads of campden tablets and sterilising solution
and more ....
The car was full!
We had a bit of a sort out when we got home. We now have 1 bucket with all our main kit, the things we'll use regularly, like one tube, hydrometer, airlocks, yeasts, chemicals etc. We have another bucket with spare kit that we won't normally need. The filter kit is now in a 3rd bucket and the bottling / corking equipment is in a 4th bucket.
Also in the kit he gave us were his winemaking logs from years ago - some records were from back in the 1960's! The missus loves these and we're going to look after them and maybe follow some of the recipes.
To say thanks, we'll be dropping some wine off to Ron sometime soon. It would be nice to send him some homebrew, although we don't want to risk delivering something that turns out to be undrinkable, so we might buy some instead ....
Raspberry & Redcurrant Wine 1
Started 23rd April 2012
We had 3lbs of redcurrants and another 2 or 3lbs of raspberries in the freezer. We didn't really fancy a pure redcurrant wine so thought we'd go for a mix of raspberries and redcurrants. We decided to re-use a little bit of the pulp from the previous raspberry wine as that already has yeast in.
Raspberry & Redcurrant Wine Recipe 1
Step 1:
Crush 2lbs raspberries and 1lb redcurrants in a 5 litre bucket
Add 1 teaspoon of pectolase to break down the fruit and extract flavour and colour
Dissolve 2.5lb sugar in 5 pints of water and add to bucket
Add 1 teaspoon yeast nutrient
Top up bucket to 4.5 litres (1 gallon) with cold water
Test SG and add sugar to bring up to 1090*
Put in airing cupboard to ferment for 7 days
* The hydrometer floated quite high, SG reading about 1135, so (from what I'd read) it didn't need any more sugar
Step 2:
Strain the liquid into a cleaned, sterilised demijohn
Fit bung and airlock to demijohn
Leave to ferment for a few weeks (maybe 6)
Result so far ....
This is another that looks good, looks like it'll clear well. The airlock is blipping away nice and steadily.
We had 3lbs of redcurrants and another 2 or 3lbs of raspberries in the freezer. We didn't really fancy a pure redcurrant wine so thought we'd go for a mix of raspberries and redcurrants. We decided to re-use a little bit of the pulp from the previous raspberry wine as that already has yeast in.
Raspberry & Redcurrant Wine Recipe 1
Crush 2lbs raspberries and 1lb redcurrants in a 5 litre bucket
Add 1 teaspoon of pectolase to break down the fruit and extract flavour and colour
Dissolve 2.5lb sugar in 5 pints of water and add to bucket
Add 1 teaspoon yeast nutrient
Top up bucket to 4.5 litres (1 gallon) with cold water
Test SG and add sugar to bring up to 1090*
Put in airing cupboard to ferment for 7 days
* The hydrometer floated quite high, SG reading about 1135, so (from what I'd read) it didn't need any more sugar
Step 2:
Strain the liquid into a cleaned, sterilised demijohn
Fit bung and airlock to demijohn
Leave to ferment for a few weeks (maybe 6)
This is another that looks good, looks like it'll clear well. The airlock is blipping away nice and steadily.
Blackberry Wine 1
Started 23rd April 2012
We had about 10lbs of blackberries in the freezer from last year so they were next on the list for the wine. This time, we decided to go for a bigger 3 gallon / 15 litre bucket - that should be enough for 18 bottles. Why make small buckets (which give 6 bottles at a time) when we can make much more in the same time?!
The method here is slightly different to the raspberry wine recipes in that we put everything in the bucket on the same day and just let it do it's thing.
Blackberry Wine Recipe 1
Step 1:
Crush 9lbs blackberries in a 3 gallon bucket
Dissolve 7.5lbs sugar in warm water (do in smaller batches, like 2lbs in 3 pints of water) and add to the bucket
Add 3 teaspoons pectolase to help extract flavour and colour
Add 3 teaspoons yeast nutrient
Add 3 teaspoons red wine yeast
Cover and leave for one week then strain into demijohns
We did take an SG reading before adding the yeast, but can't remember the reading - whatever the reading was, it was ok as we carried on.
The mixture frothed up quite well - too well in fact - so after 2 days, we decided to take some out and put it in a 1 gallon / 5 litre bucket. The downside was that we couldn't guarantee the quantities of fruit / sugar etc in the amount removed being the ideal proportions. But hey ho, worth taking a chance!
Step 2:
Strain through sieve into cleaned, sterilised demijohns
Top up with cold water to the "shoulder" of the demijohn
Fit bung and airlock to demijohn
Leave to ferment for a few weeks (maybe 6)
Result so far ....
We strained both buckets into the demijohns. We filled 3 demijohns and the 4th needed about 1 pint of water to top up. They are a lovely dark red, hopefully will clear nicely. We have labelled the 4th demijohn so we know at bottling time if it tastes much different to the other 3 demijohns.
New Shelving Unit
The same day that we started our first wines, we took a trip out to look for a new cooker. On the way, we stopped in a couple of charity shops.
And there is was - the perfect solution to shelving for the demijohns! A tubular steel framed unit with thick glass shelves. It's just the right size to stand behind the stationary cupboard in the home office, and open ended so easy to put demijohns into.3 shelves will hold 9 demijohns each, with a bit of room for ingredients and other bits. There's room underneath for all our equipment and more demijohns.
The unit was delivered the same day. Result!
I then spent a couple of hours emptying the office so I could set the shelving unit up .... and then putting all the junk back in the office until I get round to putting it all in the loft ....
Raspberry Wine 2
Started 14th April 2012
This is our second batch of wine, started 2 weeks ago, so a bit of catching up to do with the record keeping.
This is similar to batch 1, except using currants instead of grape concentrate. Currants are made from Corinth grapes and are a lot cheaper than the grape concentrate
Raspberry Wine Recipe 2
Step 1:
Crush 3lb raspberries in a 5 litre (1 gallon) bucket
Add 1 teaspoon of pectolase to break down the fruit and extract flavour and colour
Add 2.5lb sugar
Cover tightly, leave for 24 hours
Step 2:
Simmer 500g pack of Sainsburys Basics Greek Currants in 3 pints of water for 30 mins
Allow to cool and add to bucket
Then add:
1 teaspoon yeast nutrient
1 teaspoon wine yeast
Top up bucket to 4.5 litres (1 gallon) with cold water
Test SG and add sugar to bring up to 1090*
Put in airing cupboard to ferment for 7 days**
* The hydrometer floated quite high, SG reading about 1130, so (from what I'd read) it didn't need any more sugar
** 5 days should have been enough, but it's a weekend thing for us, so we just left it for 7 days
Step 3:
Strain the liquid into a cleaned, sterilised demijohn
Top up with cold water to the "shoulder" of the demijohn
Fit bung and airlock to demijohn
Leave to ferment for a few weeks (maybe 6)
Result so far ....
It looks good, nice red colour, but I'd describe it as cloudy. The airlock is blipping nicely, but at half the rate of the first raspberry wine.
Step 4:
Rack off into clean, sterilised demijohn
Add 1 crushed campden tablet
Add 1tsp potassium sorbate to stop the ferment
Shake well
Fit airlock and leave for 2 or 3 weeks to degas, giving it a gentle shake every couple of days.
Results now ... A very strong raspberry flavour, and very sweet. Should have tested SG before stopping the ferment. SG after stopping the ferment was 1015, so it's quite sweet - it could have continued fermenting a bit longer, which would have made a stronger, dryer wine.
Step 5:
Bottle - Bottled 19th July 2012
Verdict:
This is a really nice, sweet wine - a dessert wine. The strong raspberry flavour has mellowed. Definitely one to make again.
The reason this is sweeter than Raspberry Wine 1 is that we used currants instead of grape juice. The currants have twice as much sugar as the grape juice. We could have either used a little bit less sugar, or left the wine to continue fermenting a bit longer.
This is our second batch of wine, started 2 weeks ago, so a bit of catching up to do with the record keeping.
This is similar to batch 1, except using currants instead of grape concentrate. Currants are made from Corinth grapes and are a lot cheaper than the grape concentrate
Raspberry Wine Recipe 2
 |
| Raspberry wine 2 |
Crush 3lb raspberries in a 5 litre (1 gallon) bucket
Add 1 teaspoon of pectolase to break down the fruit and extract flavour and colour
Add 2.5lb sugar
Cover tightly, leave for 24 hours
Step 2:
Simmer 500g pack of Sainsburys Basics Greek Currants in 3 pints of water for 30 mins
Allow to cool and add to bucket
Then add:
1 teaspoon yeast nutrient
1 teaspoon wine yeast
Top up bucket to 4.5 litres (1 gallon) with cold water
Test SG and add sugar to bring up to 1090*
Put in airing cupboard to ferment for 7 days**
* The hydrometer floated quite high, SG reading about 1130, so (from what I'd read) it didn't need any more sugar
** 5 days should have been enough, but it's a weekend thing for us, so we just left it for 7 days
 |
| Raspberry wines 1 & 2 - this one is on the right |
Strain the liquid into a cleaned, sterilised demijohn
Top up with cold water to the "shoulder" of the demijohn
Fit bung and airlock to demijohn
Leave to ferment for a few weeks (maybe 6)
Result so far ....
It looks good, nice red colour, but I'd describe it as cloudy. The airlock is blipping nicely, but at half the rate of the first raspberry wine.
Step 4:
Rack off into clean, sterilised demijohn
Add 1 crushed campden tablet
Add 1tsp potassium sorbate to stop the ferment
Shake well
Fit airlock and leave for 2 or 3 weeks to degas, giving it a gentle shake every couple of days.
Results now ... A very strong raspberry flavour, and very sweet. Should have tested SG before stopping the ferment. SG after stopping the ferment was 1015, so it's quite sweet - it could have continued fermenting a bit longer, which would have made a stronger, dryer wine.
Step 5:
Bottle - Bottled 19th July 2012
Verdict:
This is a really nice, sweet wine - a dessert wine. The strong raspberry flavour has mellowed. Definitely one to make again.
The reason this is sweeter than Raspberry Wine 1 is that we used currants instead of grape juice. The currants have twice as much sugar as the grape juice. We could have either used a little bit less sugar, or left the wine to continue fermenting a bit longer.
Raspberry Wine 1
Started 14th April 2012
This is our first batch of wine, started 2 weeks ago, so a bit of catching up to do with the record keeping.
Raspberry Wine Recipe 1
Step 1:
Crush 3lb raspberries in a 5 litre bucket
Add 1 teaspoon of pectolase to break down the fruit and extract flavour and colour
Add 2.5lb sugar
Cover tightly, leave for 24 hours
Step 2:
245ml tin of red grape concentrate
1 teaspoon yeast nutrient
1 teaspoon wine yeast
Top up bucket to 4.5 litres (1 gallon) with cold water
Test SG and add sugar to bring up to 1090*
Put in airing cupboard to ferment for 7 days**
* The hydrometer floated quite high, SG reading about 1135, so (from what I'd read) it didn't need any more sugar
** 5 days should have been enough, but it's a weekend thing for us, so we just left it for 7 days
Step 3:
Strain the liquid into a cleaned, sterilised demijohn
Top up with cold water to the "shoulder" of the demijohn
Fit bung and airlock to demijohn
Leave to ferment for a few weeks (maybe 6)
Result so far ....
It looks good, looks like it'll become a really clear wine, deep red colour. The airlock is blipping nicely.
Step 4:
Rack off into clean demijohn
Add 1 crushed campden tablet
Add 1tsp potassium sorbate to stop the ferment
Shake well to mix and degas
Fit airlock and leave alone for 2 or 3 weeks to degas - give the demijohn a gentle shake every couple of day.
Results now .... Tastes good, strong raspberry flavour, a bit like pure raspberry juice, but alcoholic. Tested SG at this point - reading of 0.990, so it's a fairly dry wine. Should have tested SG sooner - must get into the habit of testing SG before racking off and stopping the ferment.
Step 5:
Bottle - Bottled 19th July 2012
Verdict:
The flavour has mellowed, it's not such a strong raspberry flavour, really nice wine now. This is definitely one we'll make more of.
This is our first batch of wine, started 2 weeks ago, so a bit of catching up to do with the record keeping.
Raspberry Wine Recipe 1
 |
| Raspberry wine with grape concentrate |
Crush 3lb raspberries in a 5 litre bucket
Add 1 teaspoon of pectolase to break down the fruit and extract flavour and colour
Add 2.5lb sugar
Cover tightly, leave for 24 hours
Step 2:
245ml tin of red grape concentrate
1 teaspoon yeast nutrient
1 teaspoon wine yeast
Top up bucket to 4.5 litres (1 gallon) with cold water
Test SG and add sugar to bring up to 1090*
Put in airing cupboard to ferment for 7 days**
* The hydrometer floated quite high, SG reading about 1135, so (from what I'd read) it didn't need any more sugar
** 5 days should have been enough, but it's a weekend thing for us, so we just left it for 7 days
Step 3:
Strain the liquid into a cleaned, sterilised demijohn
Top up with cold water to the "shoulder" of the demijohn
Fit bung and airlock to demijohn
Leave to ferment for a few weeks (maybe 6)
Result so far ....
It looks good, looks like it'll become a really clear wine, deep red colour. The airlock is blipping nicely.
Step 4:
Rack off into clean demijohn
Add 1 crushed campden tablet
 |
| Raspberry wines 1 & 2 - this one is on the left |
Shake well to mix and degas
Fit airlock and leave alone for 2 or 3 weeks to degas - give the demijohn a gentle shake every couple of day.
Results now .... Tastes good, strong raspberry flavour, a bit like pure raspberry juice, but alcoholic. Tested SG at this point - reading of 0.990, so it's a fairly dry wine. Should have tested SG sooner - must get into the habit of testing SG before racking off and stopping the ferment.
Step 5:
Bottle - Bottled 19th July 2012
Verdict:
The flavour has mellowed, it's not such a strong raspberry flavour, really nice wine now. This is definitely one we'll make more of.
In The Beginning ....
I first tried the home brew many years ago when I was about 18. It was beer and it was flat and crap.
25 years later, I'm having another go, but this time with wine. Im older and (in theory) wiser, rarely drink beer these days, love a drop of red wine. The missus loves a gallon or three of red wine too.
Best of all, we're both really into growing our own fruit and veg and the winemaking, so hopefully we'll have gallons and gallons of top notch home brew!
Subscribe to:
Comments (Atom)